Wireless Setup Tips
More Information
While a bit dated, the "Wireless" section in the NST FAQ still has many useful tips related to using wireless cards.
Wireless and the NST Virtual Machine
When running the NST distribution within a VMware virtual machine, it is important to remember that any physical wireless cards in the system will appear as Ethernet cards to the NST. This is due to the manner that VMware virtualizes and presents wireless cards to the virtualized environment. When used in this manner, the virtualized NST system will be limited to using wireless cards as if they were standard Ethernet NICs.
For full access to the wireless tools included in the NST distribution, one will either need to boot the system directly from the Live CD or a hard disk installation of the NST.
Cellular Modem Notes
- Sprint Mobile Broadband
- Notes on using Sprint Mobile Broadband under Linux.
WPA-PSK Setup
Starting with the 1.8.0 release of the NST, support for setting up WPA and WPA2 connections using the PSK (pre-shared key) method has been provided.
While not quite as simple as using the NetworkManager available on a Fedora Gnome desktop, a WUI page has been provided to make setting up a WPA-PSK connection a fairly painless process.
Assumptions
- A laptop will be used to boot the NST distribution, and this laptop will have no wired connections.
- The laptop will contain a wireless card compatible with the NST distribution (we have had good luck with Aetheros and Intel based cards).
- A Access Point which supports WPA or WPA2 access using the PSK method is available.
- One knows the ASCII value of the PSK (the pass phrase required to connect).
- There is a DHCP server running on the network (typically the Access Point).
Summary
- Boot the NST from the Live CD (a hard disk boot is also acceptable).
- Setup/Start X so that we can launch Firefox.
- Bring up the WPA-PSK setup page in Firefox.
- Enter the SSID and PSK of the wireless network and press the Perform WPA-PSK Setup button to connect to the network.
- Stop the X server (and optionally restart it).
Detailed Steps
Booting
- Insert the Live CD into the laptop and boot.
- When the boot screen appears, wait 5 seconds, or press the Enter key to boot the system in desktop/laptop mode.
- When prompted to set the system password, do so and make sure you remember the password entered (you will need this to log into the system and to use the WUI interface).
- Log into the system as the root user (using the password you specified).
Setup/Start X
- Run the command: "setup_x" command to configure your laptop's graphics adapter. Typically the Video Card will be properly detected, but often the Monitor Type will not be properly detected. The Display Settings utility permits one to set both of these options under Hardware tab (I will typically select one of the Generic LCD Display setting whose pixel dimensions match the laptop in use).
- After changing any options under the Hardware tab, return to the Settings tab and specify the resolution and color depth (I typically match the resolution of the laptop and select the "Millions of Colors" color depth).
- After configuring the display, you will be kicked back out to the console prompt.
- Run the command: "init 5" to switch the NST system from a console based mode to a graphical login based mode.
- At this point you should be able to log back into the system and have a graphical desktop available.
The entry titled "How Do I Enable A Graphical Login?" in the "Bringing Up X" section in the NST FAQ can be referred to for additional details. If you have a hard disk installation, you may want to follow the directions so that your NST system boots directly to graphical desktop mode.
Goto The WPA-PSK Setup Page
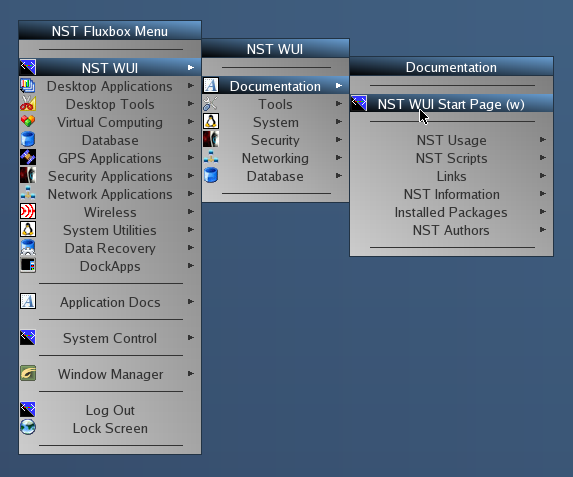
- Open the menu by right clicking on the desktop.
- From the NST WUI menu, select Documentation and then select NST WUI Start Page (w).
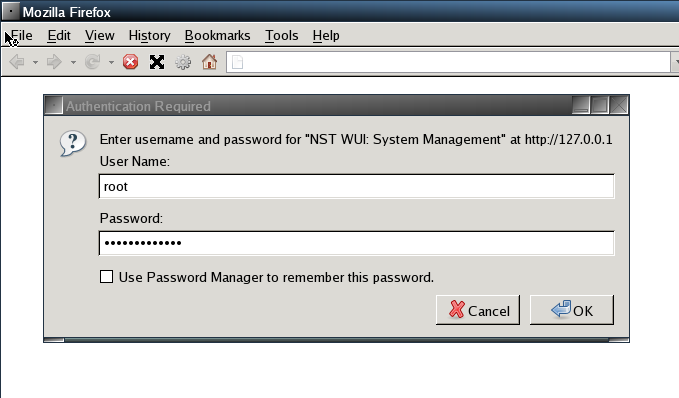
- Log into the NST WUI using: "root" as the "User Name" and the the password you specified for the root user when you booted the system.
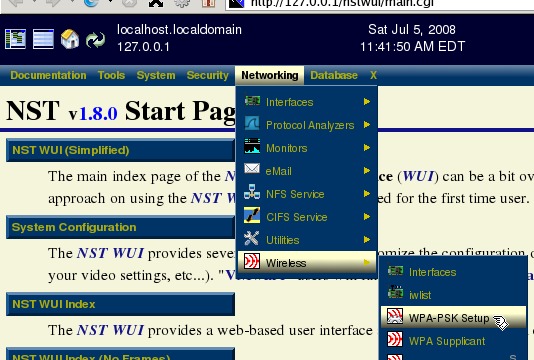
- From the NST WUI menu bar, select Networking, then Wireless, then WPA-PSK Setup.
Configure/Connect
- The WPA-PSK Setup page in the NST WUI will attempt to detect the wireless card(s) available in the system. If a wireless card supported by the NST distribution is detected, you will see something similar to the following:
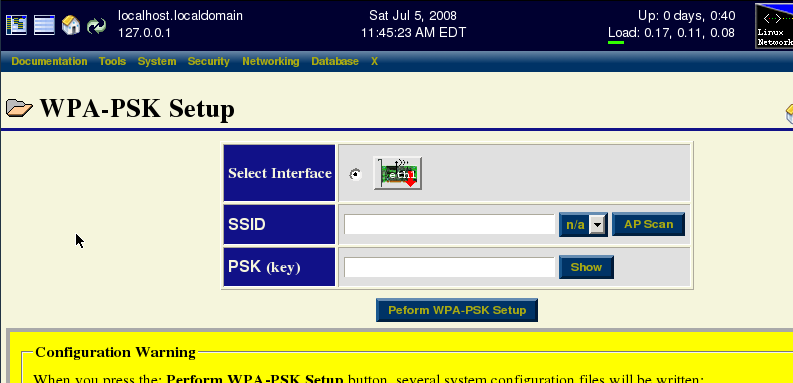
- Select the wireless interface you want to use for your connection (if only a single wireless adapter is found, it should already be selected).
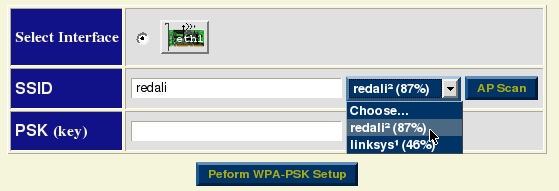
- Optionally, press the AP Scan button to search for Access Points within range of your NST system (you may need to wait a few moments for the scan to complete).
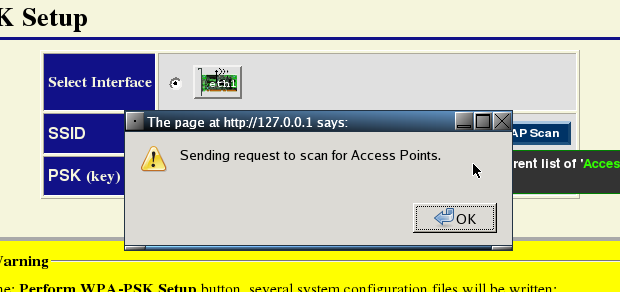
- Enter (or select from the results of the scan) the SSID of the network you wish to connect to.
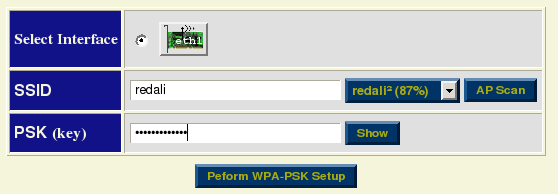
- Enter the PSK used to connect to the network.
- Press the Perform WPA-PSK Setup button.
- After a few moments (less than a minute), the connection should be established and you should see a "green" status report indicating that the connection was successfully made. If you see a failure message related to the stopping of the wpa_supplicant service (as shown in the image below), this can be ignored as the wpa_supplicant may not have been running when we restarted the service.
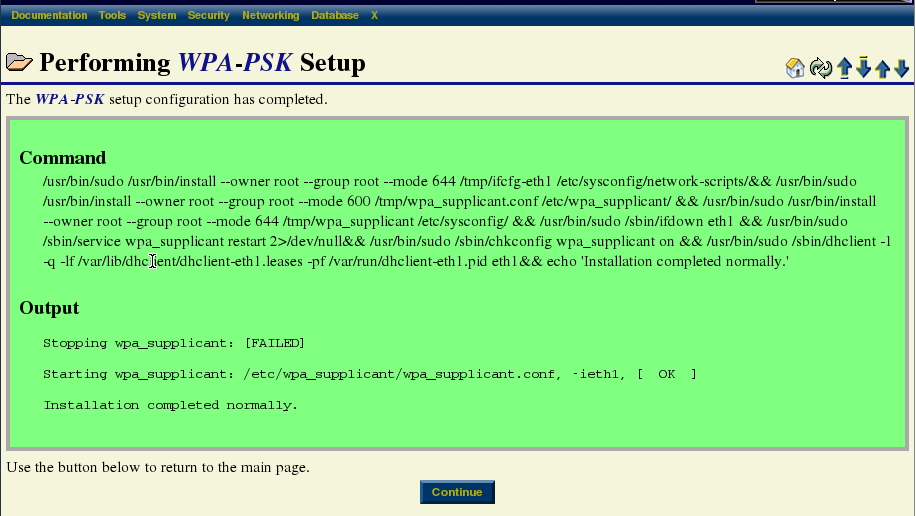
- Press the Continue button at the bottom of the page.
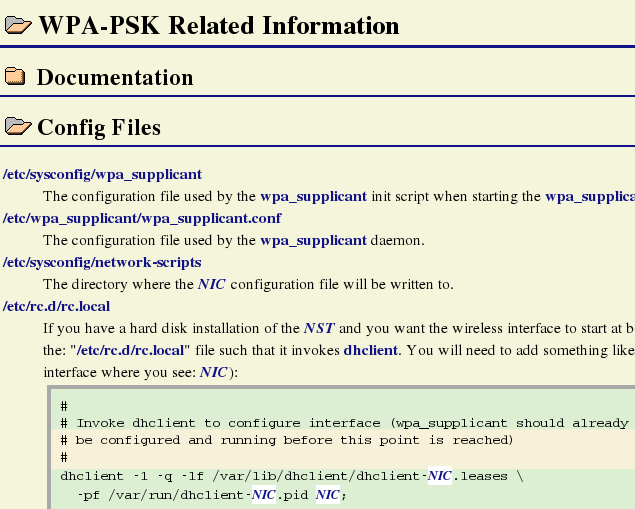
- Review the information in the WPA-PSK Related Information folders near the bottom of the page. If you have your NST installed on a hard disk partition, you will find notes under the Config Files section on how to enable the wireless interface at boot time.
Exit/Restart X
Since we setup the network connection AFTER having started X, it is likely that we will need to restart X before being permitted to launch any more applications (you can check by trying to launch a new terminal - if it fails to come up, you will need to restart your X server.
To restart the X server:
- Quit Firefox.
- From the terminal window, run the command: "init 3". If you don't have a open terminal on your desktop, you can press: Ctrl+Alt+F2 to switch to a console window to run the command from.
- Running: "init 3" should have kicked you back to a console prompt.
- To restart the X server, run: "init 5".