HowTo Geolocate traceroute Data: Difference between revisions
No edit summary |
|||
| (One intermediate revision by the same user not shown) | |||
| Line 82: | Line 82: | ||
== Missing Locations == | == Missing Locations == | ||
When | When viewing the IP addresses in ''Google Earth'', you may notice that some IP address found by the ''traceroute'' command are missing from the map. This is because not all IP addresses can be geolocated. You can review the text rendering (the ''T'' button) to view all of the IP addresses found by the ''traceroute'' command. | ||
By default, ALL private IP addresses will be omitted. | By default, ALL private IP addresses will be omitted. | ||
| Line 92: | Line 92: | ||
== Bad Locations - Hello Kansas! == | == Bad Locations - Hello Kansas! == | ||
Some IP addresses are located, but only to country accuracy. For example, in the US, when a IP address can't be resolved very accurately, but can be resolved to having originated in the US, the geolocation engine will return | Some IP addresses are located, but only to country accuracy. For example, in the US, when a IP address can't be resolved very accurately, but can be resolved to having originated in the US, the geolocation engine will return latitude and longitude coordinates located in Kansas. | ||
This can be frustrating when visualizing ''traceroute'' data on a map as you might see sequences like: | This can be frustrating when visualizing ''traceroute'' data on a map as you might see sequences like: | ||
Latest revision as of 15:43, 17 September 2010
Quick Start
Once you've set up your NST system such that it can geolocate IP addresses (see: HowTo Setup The NST System To Geolocate Data), you will be able to geolocate traceroute information and view the results in Google Earth.
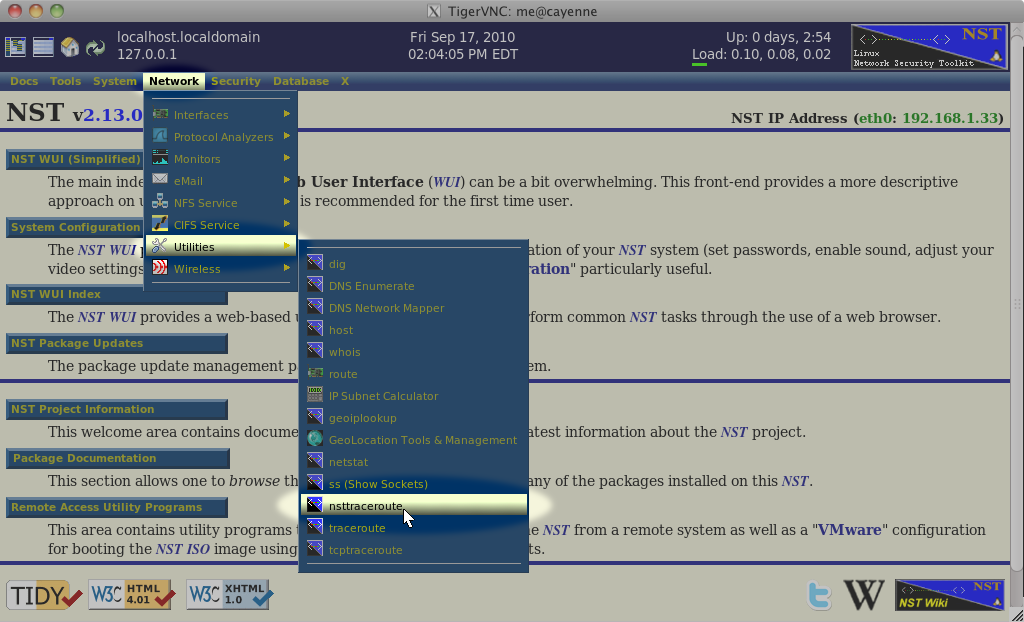
Locating The "nsttraceroute" Page
The following shows how you locate the "nsttraceroute" page using the NST WUI:
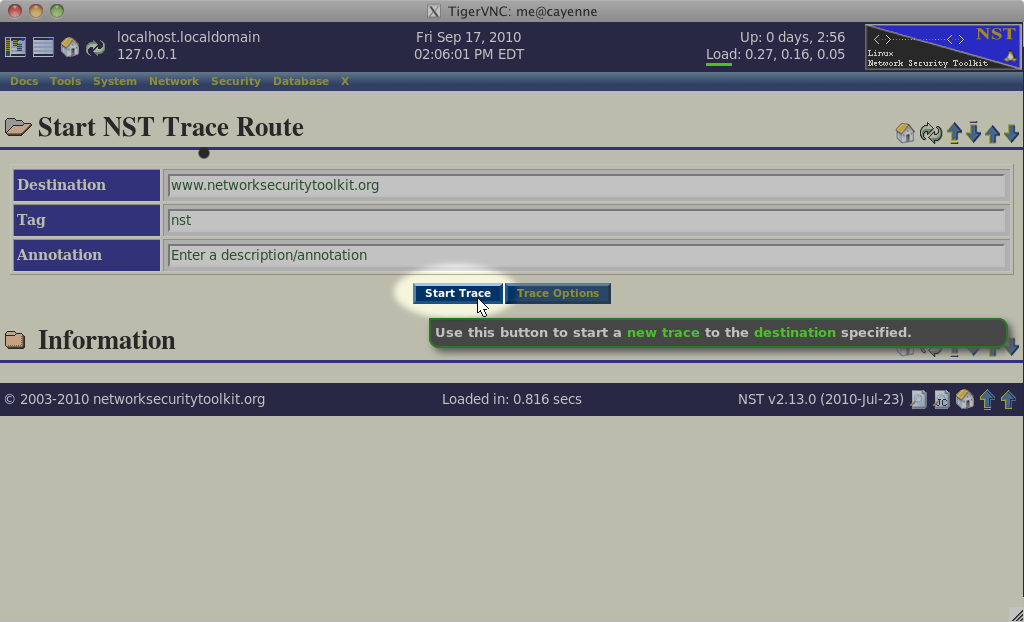
Starting The Trace
After filling in or adjusting the values in theDestination, Tag, and Annotation Fields, press the Start Trace button to begin the "nsttraceroute" command.
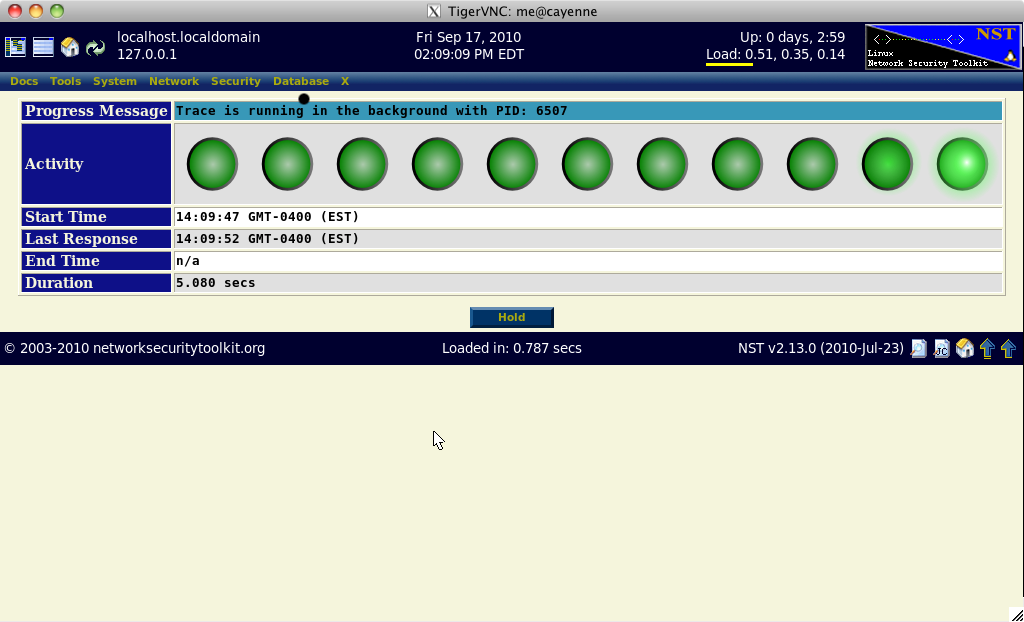
Wait For The Trace To Complete
The "nsttraceroute" command will take a bit of time to complete. While it is running, you will see the progress page shown below. After the process completes, the page will automatically transition to the results view (unless you press the Hold button first).
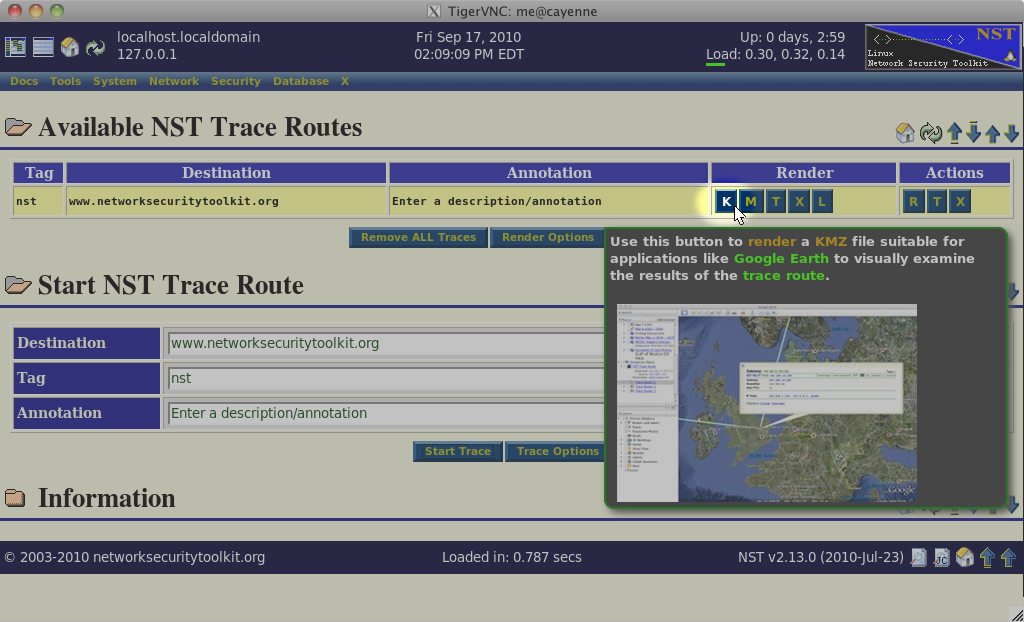
Select the "K" (KMZ) Action Button
Each time you run the "nsttraceroute" command, the results will appear in the results table at the top of the page. Select the K action button to download a KMZ rendering of the results which can be viewed in Google Earth.
Selecting Google Earth To View The Results
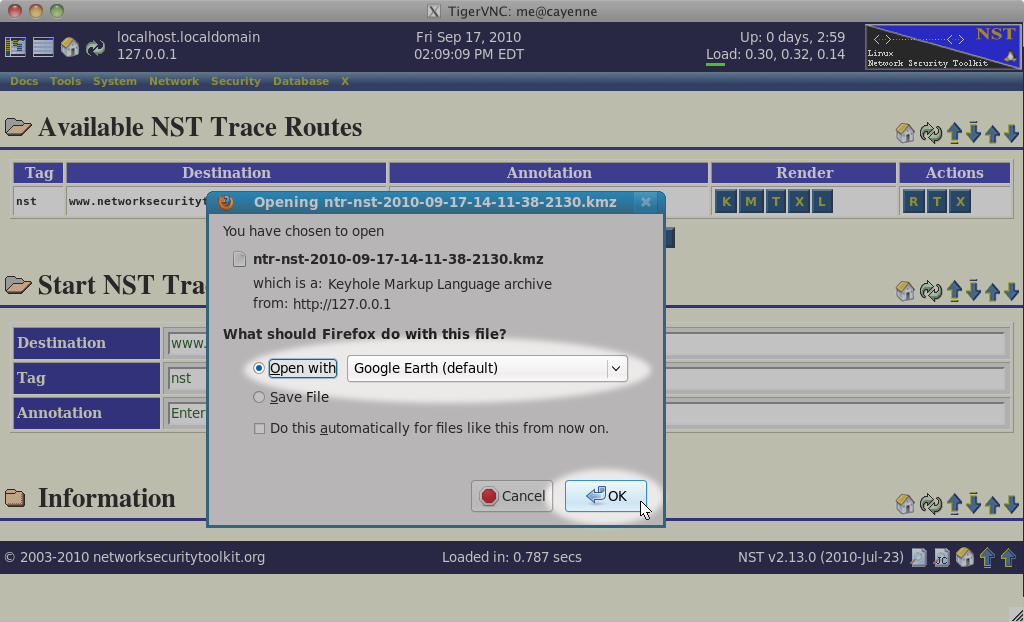
If Google Earth is properly installed on your system, the KMZ file should open automatically, OR you might be prompted as shown below. If you are prompted, then make sure that Google Earth is selected and then press the Open button as shown below:
Viewing The "nsttraceroute" KMZ File In Google Earth
Once the KMZ file has been downloaded and opened by Google Earth, you should see your data displayed as a set of bulls eyes with connection lines. It might look something like the following:
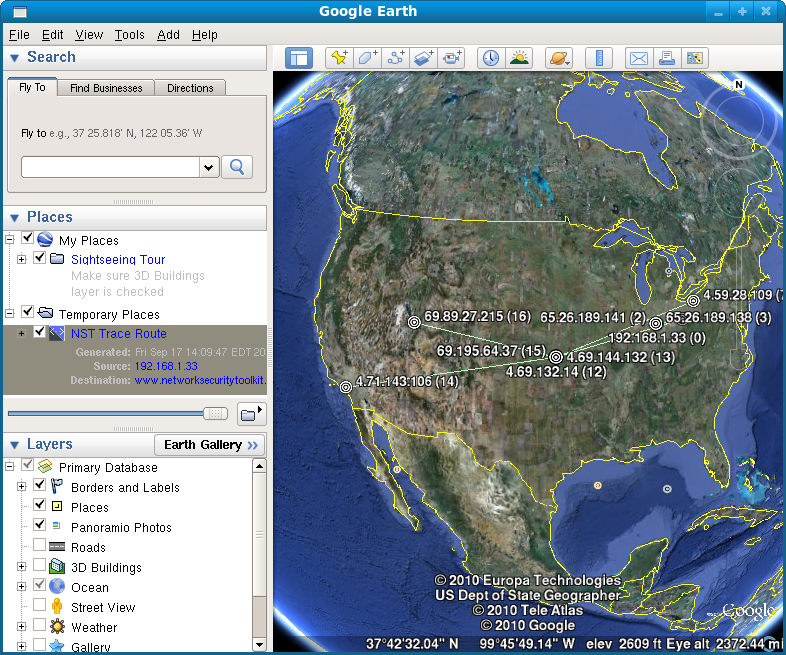
You should be able to explore the data collected. Selecting items on the map, or on the side navigation panel should display balloon messages providing detailed information.
Doing More From The "nsttraceroute" Page
There are a lot of things you can do on the nsttraceroute page. The page is designed to be straight forward to use and every input field, button or clickable icon should have a tooltip providing additional information.
Changing Options
Before pressing the Start Trace button, there are many options which you can adjust that will change the invocation of the traceroute command. To adjust this values:
- Press the Trace Options button located next to the Start Trace button.
- Adjust the various parameters to your liking. Each parameter field has a tooltip which will describe how the parameter is used.
- Press the Save & Close (or Save) button when you are done. You MUST press one of these buttons prior to using the Start Trace button.
Managing And Rendering Results
Each time you specify a new Tag value, a new row with the corresponding Tag field will appear in the results table at the top of the page. There are many buttons which allow you to manage and render these results. Each of these buttons has a tooltip describing how the button is used.
Here are some of the things that you can do:
- You can render the results as a KMZ file for viewing with Google Earth.
- You can render the results as a KMZ file for uploading to Google Maps.
- You can render the plain text output produced by the underlying traceroute command.
- You can view the XML file produced by the nsttraceroute command.
- You can view the log file associated with the run. You typically won't look at this file unless you are having problems, or want to write your own scripts and want to see how the nsttraceroute command is being invoked by the NST WUI.
- You can remove one or all of the results from the table.
- You can reload the Destination, Tag and Annotation fields.
- You can run the nsttraceroute command again.
Troubleshooting and Comments
Failure To Produce Results
If the traceroute command fails, you will only be able to view a log file using the L action button from the results table. It is suggested that you view this file as it may provide clues as to what went wrong.
Here is a list of issues which can prevent you from getting results:
- You did not setup the NST system to geolocate data. See: HowTo Setup The NST System To Geolocate Data.
- You specified a host name in the Destination field that could not be resolved.
- You specified a IP address that could not be reached. You might still get some results in this case, but it will take a long time to time out.
Missing Locations
When viewing the IP addresses in Google Earth, you may notice that some IP address found by the traceroute command are missing from the map. This is because not all IP addresses can be geolocated. You can review the text rendering (the T button) to view all of the IP addresses found by the traceroute command.
By default, ALL private IP addresses will be omitted.
If you know the geographic locations for any of the omitted IP addresses, you can add these locations to the /etc/nst/nstipgeolocate.py configuration file. See the: HowTo Setup The NST System To Geolocate Data page for details.
After updating the configuration, if you render your results again, the IP addresses and networks you configured should now appear on your map.
Bad Locations - Hello Kansas!
Some IP addresses are located, but only to country accuracy. For example, in the US, when a IP address can't be resolved very accurately, but can be resolved to having originated in the US, the geolocation engine will return latitude and longitude coordinates located in Kansas.
This can be frustrating when visualizing traceroute data on a map as you might see sequences like:
- Trace starts in Indianapolis IN
- Trace jumps to Kansas, KS - bad location
- Trace goes to Chicago, IL
- Trace goes to Kansas, KS - bad location
- Trace goes to Buffalo, NY
- Trace goes to Kansas, KS - bad location
- Trace ends in Albany, NY
This isn't pleasant to look at. You have the following options to deal with this situation:
- Configure your NST system such that it omits locations if they can't be resolved more accurately than the country level (less data shown on the map).
- Figure out the locations for these bad locations and add them to your NST system geolocation engine (time consuming).
- Investigate the use of alternate databases (again time consuming).
- Live with it.
See the: HowTo Setup The NST System To Geolocate Data for more details on configuring and updating the NST's geolocation engine.